EDIT 28/10/2023: Since this post was first published, Discord has been doing some changes behind the curtain to essentially block users from using it as a file hosting starting from next year. Can’t say that I blame them for that.
Therefore, I had to look up alternative hosts for the albums, and from all of the different sites I looked up, Imgur seemed to be the best alternative because of its longevity, reliability, and non-destructive compression, therefore I updated my script to upload images to Imgur instead.
So instead of following the steps described in the “Actually using Discord as a host” section (you can stop right before it asks you to create a server), follow the instructions on how to set it up from this readme. Then, its usage should be pretty much the same. After that, continue with the next section of the guide.
However, note that no free solution would ever be as reliable as paying for hosting yourself, so use it understanding that one day you may need to switch to another alternative, or start paying. For that reason, I recommend backing up all of your albums locally if you ever need to upload them to a new host.
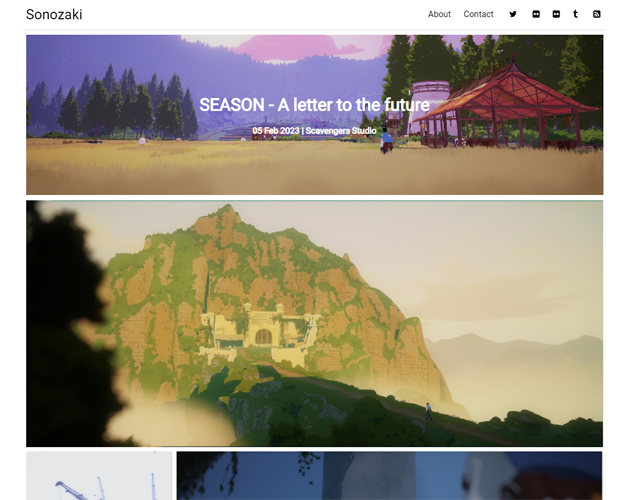
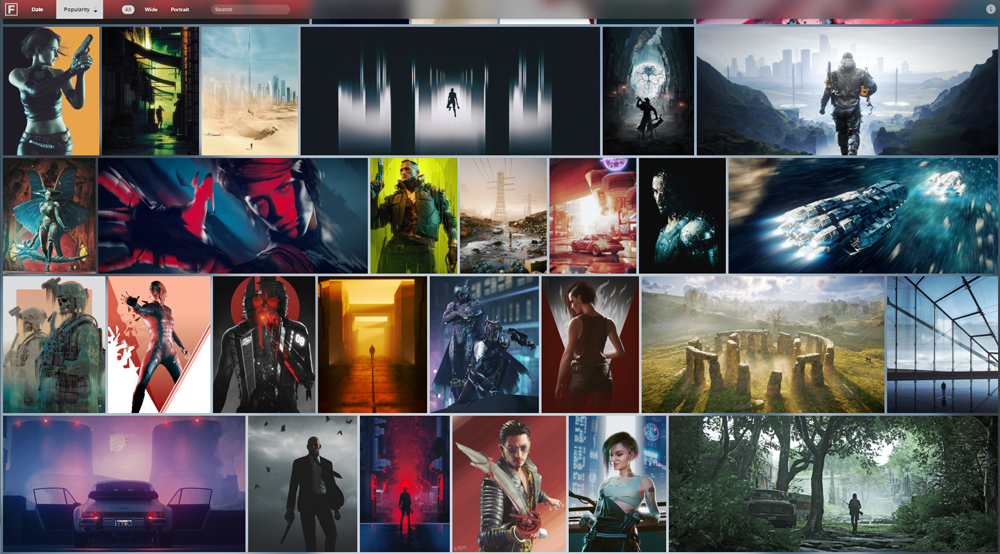
Since I worked on somewhat of a portfolio for my site here without paying for hosting, some friends asked me for suggestions on how to do it, so I am writing this in case it’s useful for more people. I will try to write it so you can make a site of your own without knowing much about Github, Python, Jekyll, or how to code in general, but will include some bits here and there explaining some stuff in case you are interested in knowing how it works. However, I won’t explain how to do some stuff (like cloning a GitHub repository) for the sake of this tutorial brevity, so you will have to look up how to do it yourself.
It might be worth mentioning that I am not very knowledgeable of Jekyll, Javascript, or CSS, so there is probably stuff I wrote that is not very pretty and could be handled better. So I apologize for that.
Before jumping into it, if you happen to be already paying for an Adobe subscription you should be able to create your own online portfolio for free.
Preparation
First of all, you will need to create a GitHub account if you don’t have one. After doing so you will need to create a repository with the following name: your-github-nick.github.io. Since I am creating a website for a friend to write this tutorial along, I will be naming it sonozki.github.io. The website will live in this URL, so take that in mind when creating your GitHub username.
To create the site itself, we will be using Jekyll, which is a static website generator. What it does is basically create some HTML files based on templates you wrote, so every time you want to add something to your site you don’t have to copy all the header, footer, and style of the page, nor link it to other parts of the site. Follow the steps here to install Jekyll.
After you do that, it’s time for you to look up a template you like! This will be how your site will look like. You will probably want a template that has a list of blog posts or something with images on its home page that you can click and will send you to that post. What we will be doing is using those to create virtual photography albums, but you can do this with whatever you want. So go to jekyllthemes.io (or other sites that display themes) and pick one you like. It might also be useful if the template has an “about me” page that we can use, but most of them have one already. For this tutorial, we will be using this theme, but please pick the one you like! If you run into trouble trying to set one up yourself, you can always grab the repository of the site we will be making as an example here and edit that to your liking. But it would be pretty cool if you can try to do this with your own theme beforehand to have variety.
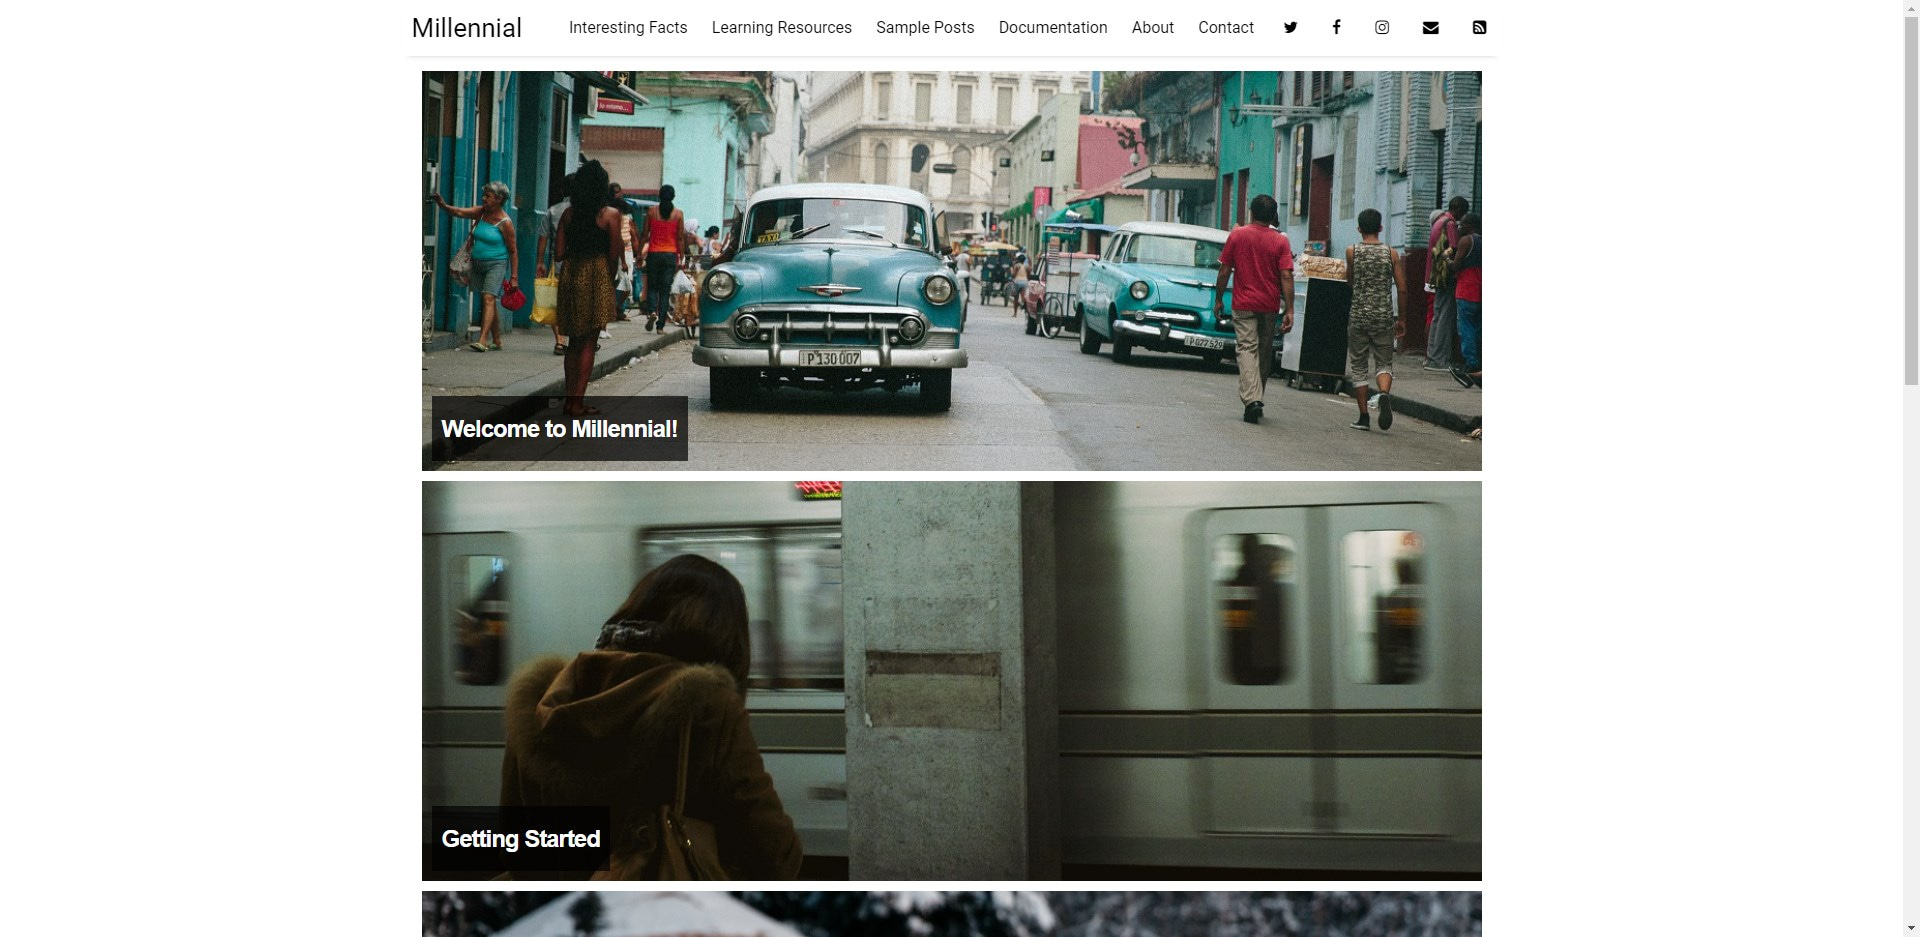
Also, you can technically not use any theme and build the site from the ground up yourself, but that would require some knowledge of HTML and CSS, besides knowing a bit more about how Jekyll works.
You will probably also want to download GitHub Desktop and clone (it’s like downloading for repositories) the new repository you created. After doing so copy all the contents of the Jekyll theme you picked and paste them into the new repository folder that you just cloned.
Before doing anything else you will want to install all the plugins the theme is using to test that we can build the site locally (and therefore test any change locally before putting it online). To do that, open the cmd in windows (or equivalent on Linux and Mac), go to your repository folder (you can simply type cmd in the window explorer when you are inside the site folder, on the file path bar on top), and run the bundle install command. When the command finishes executing, “turn on” the site with the command bundle exec jekyll serve and go to the server address written in the console (which is usually 127.0.0.1:4000) on your favorite web browser. And boom, you should be able to see the site.
Be aware that there is a chance you will get some errors when trying to run bundle install on the theme you downloaded (especially if you are on Windows). Just don’t edit any of the theme files and try to google the errors you are getting. Chances are the problem is in your machine. I know it’s frustrating but you will have to power through it.
Editing your site
Adding an example album for testing
Now it’s time to start editing the theme! To have something to work with while we edit the site, download some albums from my own page, like the Deaths Door one. Put this .md file inside the _posts folder inside your repository (this folder may change with the theme), and the .json file inside your data/virtual-photography folder (you will need to create the subfolder).
After pasting that you may want to check what the other existing .md files have on them. In the case of this theme, we need to add layout: post to our .md file, so it should end up looking like the following:
---
layout: post
date: 2022-03-05
title: Death's Door
developer: Acid Nerve
card-image: 10
card-offset: 65
banner-image: 5
banner-offset: 5
---
Be aware that depending on the theme you are using you may be looking at other layout name.
Little explanation of what everything means.
- • layout: What template Jekyll will use to render this file. Be aware that depending on the theme you are using you may be looking at another layout name.
- • date: Date used to sort the albums on the homepage (altho it depends on your theme, it might order them alphabetically).
- • title: Title of the album, which will be displayed in the banner, page name, etc.
- • developer: The developer team that made the game, shown on the banner.
- • card-image: What image from the album .json should Jekyll use when listing the album.
- • card-offset: An percentage value used to describe the vertical offset the image should have on the banner, to crop the image in the right spot.
- • banner-image: Same as card-image but with the album's banner.
- • banner-offset: Same as card-offset but with the album's banner.
The theme you use may have extra stuff, like “tags”. They are not necessary for what we will be doing, but might be useful for your particular theme.
Also since you are in there, delete the other .md files inside the _posts folder (since they are being used for testing the theme). In our case, we need to also delete the {% post_url 2016-10-10-getting-started %} line in the about.md because we deleted said file and it would throw an error otherwise.
Making the albums actually display something
We can see the Death’s Door post there now, yay! Unfortunately, when clicking it, it shows us a blank page. This is because we need to tell Jekyll how we want the album to be displayed. So to do that we will head up to the file _layouts/post.html. Here we will copy what I did on my layout, and replace it all (keep the top part of the file until the second — tho):
{% if page.banner-image %}
    {% assign banner-pic = site.data.virtual-photography[page.slug][page.banner-image] %}
{% else %}
    {% assign banner-pic = site.data.virtual-photography[page.slug][page.card-image] %}
{% endif %}

{% assign ar = banner-pic.aspect-ratio | plus: 0 %}

<style>
    .image-gallery {overflow: auto; margin-left: -1%!important;}
    .image-gallery a {float: left; display: block; margin: 0 0 1% 1%; width: 19%; text-align: center; text-decoration: none!important;}
    .image-gallery a span {display: block; text-overflow: ellipsis; overflow: hidden; white-space: nowrap; padding: 3px 0;}
    .image-gallery a img {width: 100%; display: block;}

    .banner {
    background-image: url('{{ banner-pic.image1080-link }}');
    background-size: cover;
    background-position: right 0px bottom {{page.banner-offset}}%;
    height: 300px;
    display: flex;
    align-items: center;
    justify-content: center;
    margin-bottom: 10px;

    }

    .banner-text {
    text-align: center;
    color: white;
    }

    @media (max-width: 767px) {
    .banner {
        height: 200px;
    }
    }
</style>

<div class="banner">
    <div class="banner-text">
        <h1><strong>{{ page.title }}</strong></h1>
        <p><span class="date"><time datetime="{{ page.date | date_to_xmlschema }}"><strong>{{ page.date | date_to_string}}</strong></time><strong>{% if page.developer %} | {{page.developer}} {% endif %}</strong></span> </p>
    </div>
</div>

<div class="pig-wrapper">
    <div id="pig"></div>
</div>
<script type="text/javascript" src="../js/pig.js"></script>
<script type="text/javascript">
    var imageData = [
    {% for image in site.data.virtual-photography[page.slug] %}
        {"thumbnail":"{{ image.thumbnail-link }}", "image1080":"{{ image.image1080-link }}", "imageFull":"{{ image.imageFull-link }}", "aspectRatio":{{ image.aspect-ratio }}},
    {% endfor %}
    ];
    var pig = new Pig(imageData, {
    urlForSize: function(imageUrls, sizewidth) {
    if (sizewidth <= 1080){
        return imageUrls.thumbnail;
    }
    else if(sizewidth <= 1920){
        return imageUrls.image1080;
    }
    return imageUrls.imageFull;
    },
    addAnchorTag: true,
    anchorTargetDir: "",
    anchorClass: "swipebox"
    }).enable();
    ;( function( $ ) {
    $( '.swipebox' ).swipebox();
    } )( jQuery );
</script>
If you wanna know, this piece of HTML code is separated into two parts, the first one is just the album’s banner, and the second one is all referring to the image grid of said album. If you know what you are doing, you can play around with the banner, or change it entirely for another thing. But I would suggest keeping the grid part of the code like it is. If you want to customize that I will let you know how to do that in a second.
But before we can see anything else on the site we will need to install a couple of Javascript files. So download this and this, create a js folder in your main site folder if there isn’t one yet, and put these two files inside of it.
To give a bit more context, pig.js is a library used to display a grid of images. However, the file you download is one modified by jmodjeska that adds a lightbox (which is what zooms fullscreen when clicking a photo in a gallery to display it in full size) when clicking each file, and further modified by me to be able to use image links that aren’t on the same repository as the site. And the other .js file is the lightbox code itself.
Besides including said javascript files in our js folder we will need to actually include them in our site, so we will go to _includes/head.html file and paste these lines at the end of it (before the </head> line tho):
<script src="https://code.jquery.com/jquery-2.0.3.min.js"></script>
<script src="../js/jquery.swipebox.js"></script>
<link rel="stylesheet" href="https://cdnjs.cloudflare.com/ajax/libs/jquery.swipebox/1.4.4/css/swipebox.min.css">
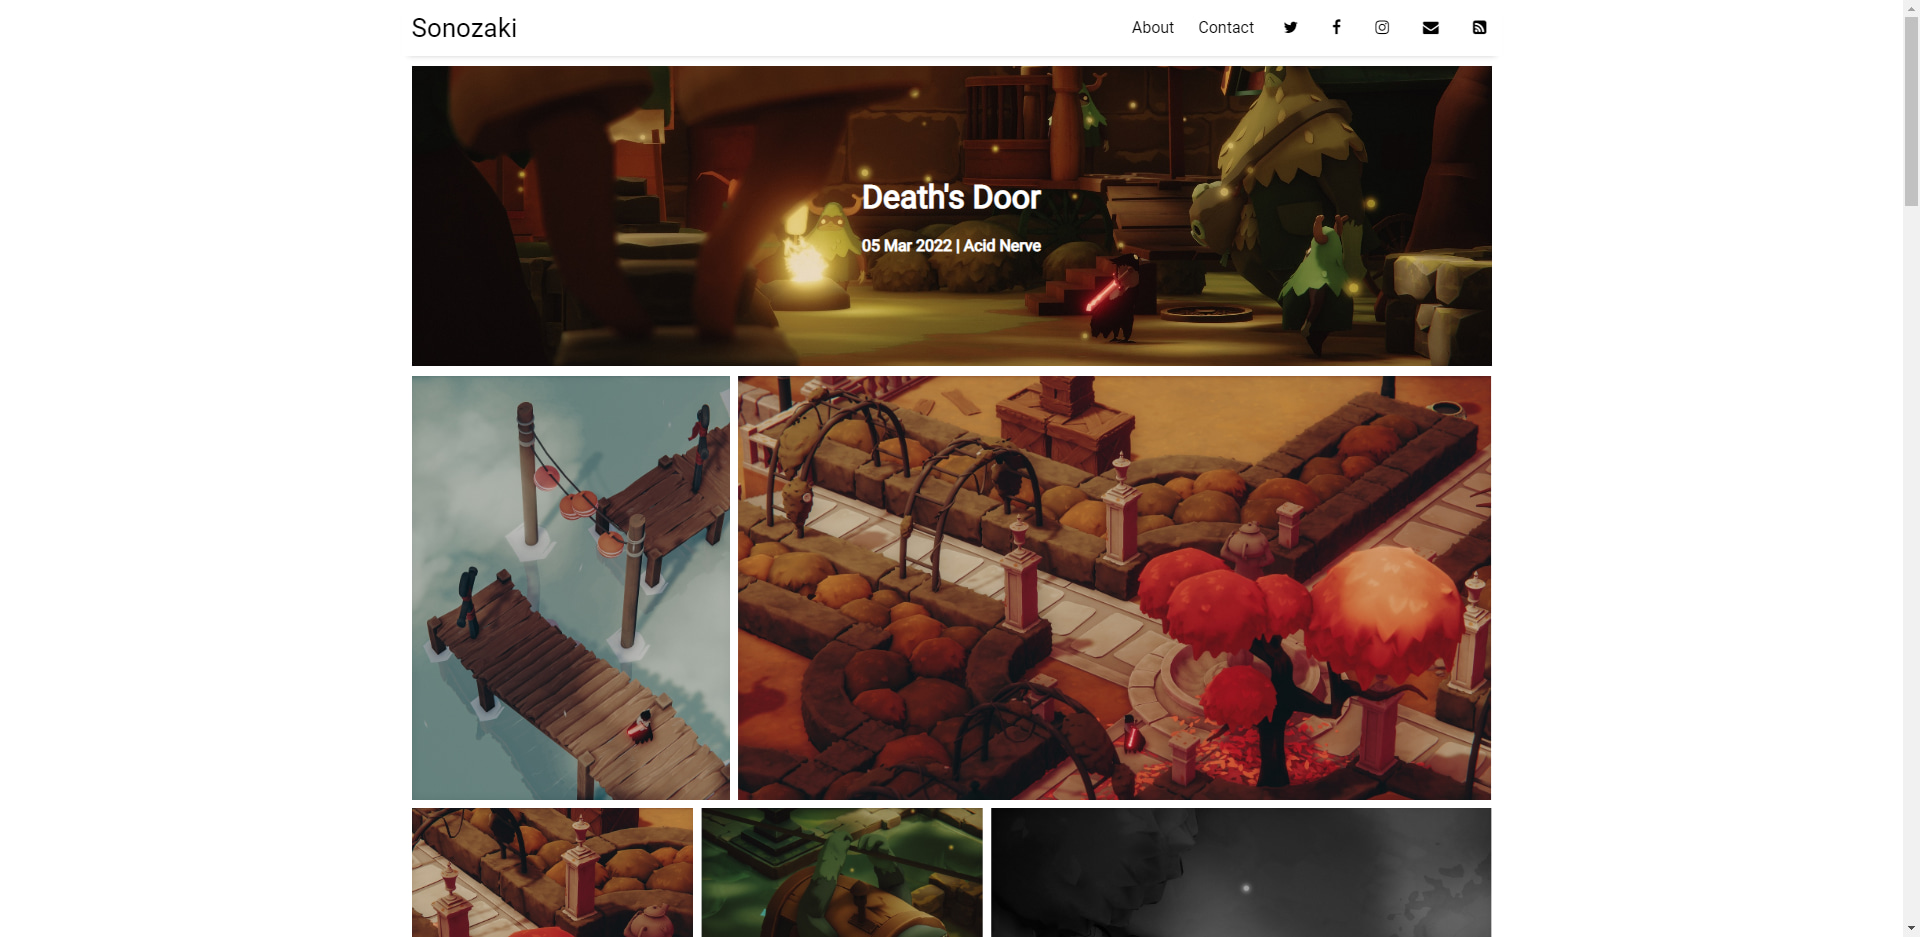
And that’s it! If the paths of the js are correct we should be able to see something like the following:
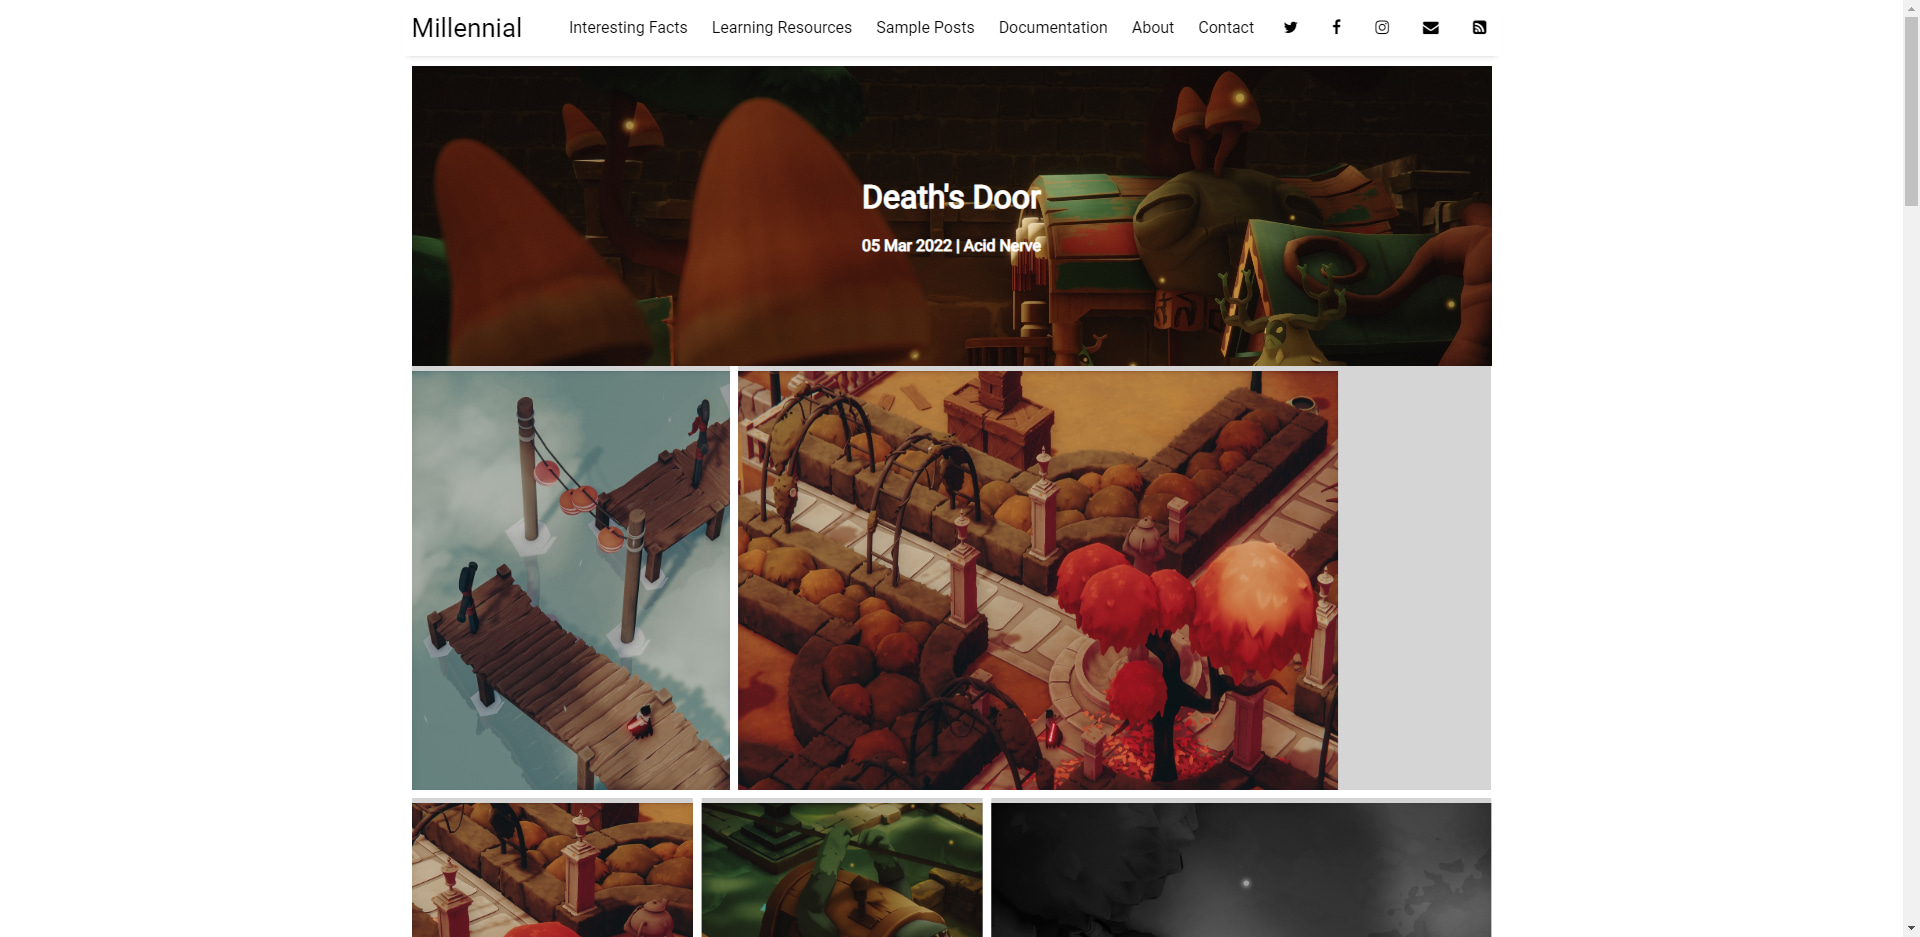
Now, we notice that the images don’t look quite right, as if they are being resized. This is because the theme is trying to change the size of all the images inside posts. To fix this, we will need to go to the .scss file that is handling this. It’s probably _base.scss, but just to make sure right-click the image on the grid, click on inspect, and look at its styles properties for any .img that might be there. It should tell you from what file said style is coming from. After deleting the part of the css code that handles images (in our case it’s base img{ [...] }) the images should look fine now, great!
Optional: Customizing the pig.js library
Before moving on to the next thing, there are a couple of things that you can config on the pig.js library by editing its code if you don’t mind getting your hands dirty.
The first one of which is to edit how much and how fast should the image zoom in when hovering your mouse over it. To change that go to this part of the code in the pig.js file, which should be around line 103:
    '  transition: transform .7s ease;' +
'}' +
'.' + classPrefix + '-figure img:hover {' +
'  transform: scale(1.05);' +
You can change the time it takes to zoom in in seconds by modifying the .7s value, and how much it zooms by changing the value inside “scale”.
The other thing you can change is how many images there should be per row. To do so look for this block code on the pig.js file, around line 320:
if (window.innerWidth / window.innerHeight  <= 0.5){
    return 0.1;
}
Change the 0.5 for another value (preferably bigger I assume) if you want to make the grid display one picture in each row on thin screens, like cellphones. Of course, you can modify the function further if you know what you are doing (I certainly didn’t when I wrote this lol), but that’s pretty much it.
Adding images to the album list
If we go to the main page of our site, we notice that the album isn’t displaying any image in the list. So what we will do is go to whatever HTML file displays the list of albums first. You should be able to find it by searching for post.image on the files (recommend using VSCode or a similar IDE that allows you to easily search strings inside multiple files on a folder). In the theme at hand, is in featured-post.html.
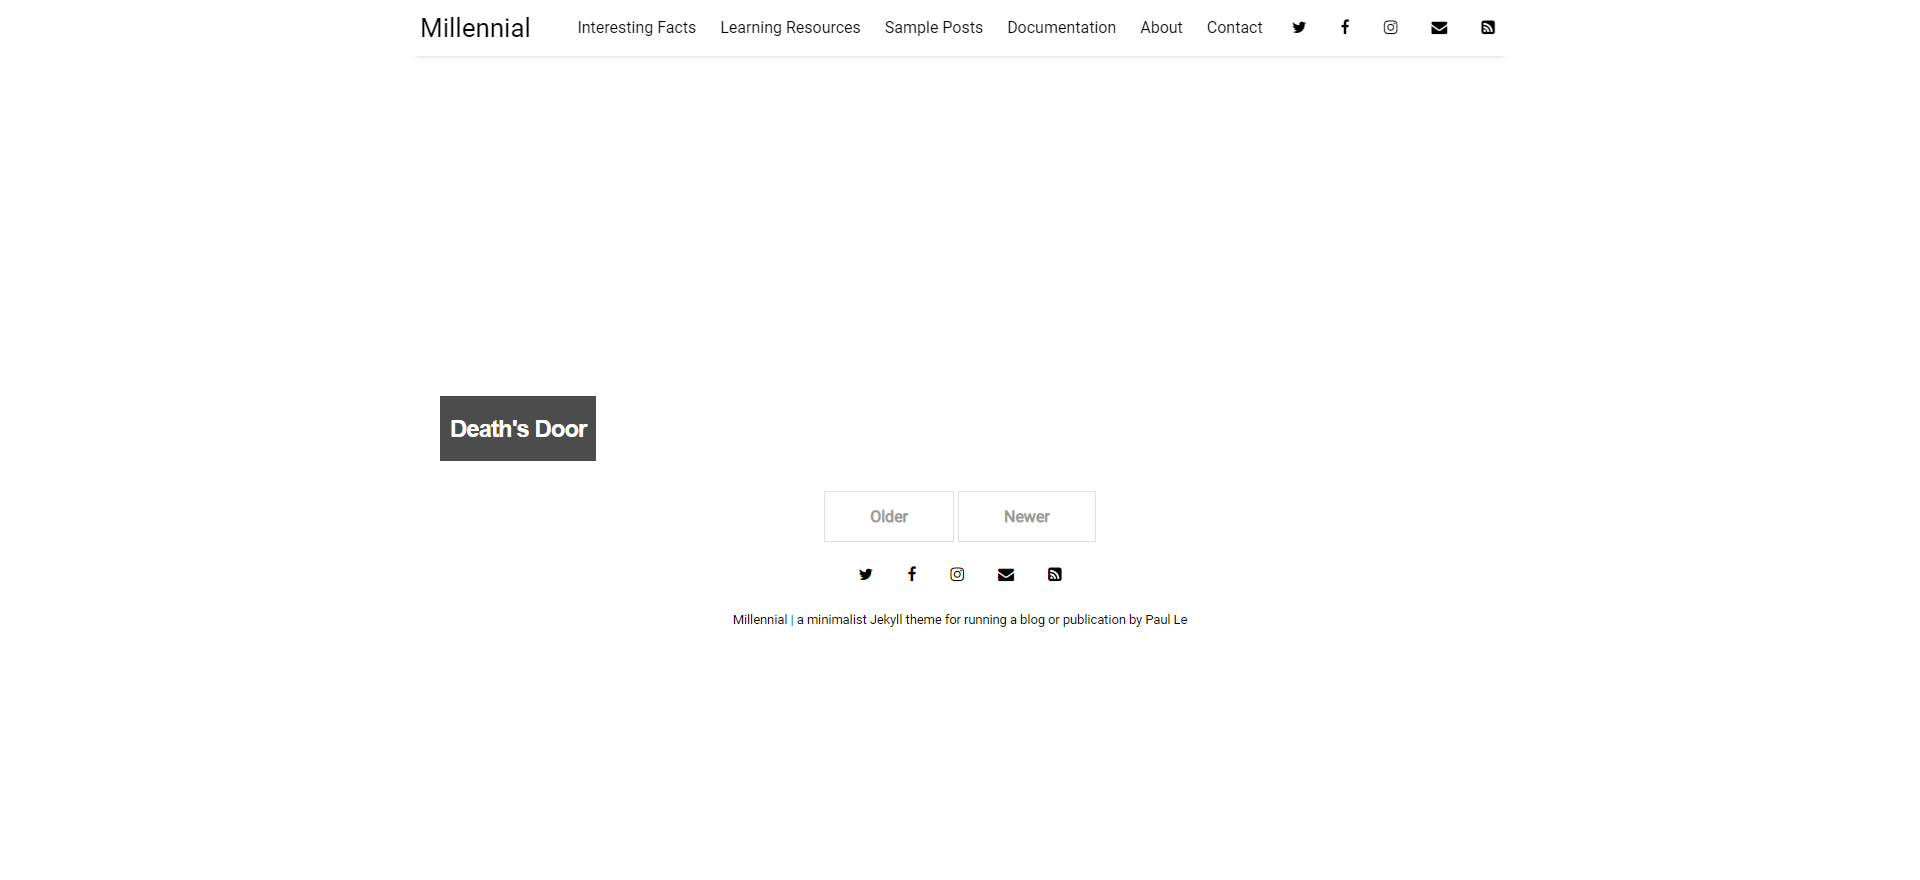
There are multiple ways in which a theme can display these images. In the case of our theme it’s doing so with the style property background-image. So to display our “card-image” here we will modify the div class that has this background-image property for the following:
<div class="featured-post" style="background-image:url({{ site.data.virtual-photography[post.slug][post.card-image].image1080-link }}); background-position: right 0px bottom {{post.card-offset}}%;">
Please notice that the class name is specific to this theme and you will need to keep the original name of the div from your theme.
If the theme happens to instead show the image with an img html tag then replace it with the following:
<img loading="lazy" src="{{ site.data.virtual-photography[post.slug][post.card-image].image1080-link }}" alt="{{ include.album.title }}" style="object-position: 0 {{post.card-offset}}%;">
Also please note that both of these code blocks will work if the name of the variable on which the for loop is iterating is called post. To check that that is the case look up the closest {% for ... %} line to where we are editing this. In our case since featured-post.html is the file used to display the album in a list, we have to look up where this is being called from. So by looking for the string {% include featured-post.html %} we found that it’s being used in category.html, and in there we can see that the closest for loop is using “post” as the variable, so we can just use the first code block I wrote above as it is.
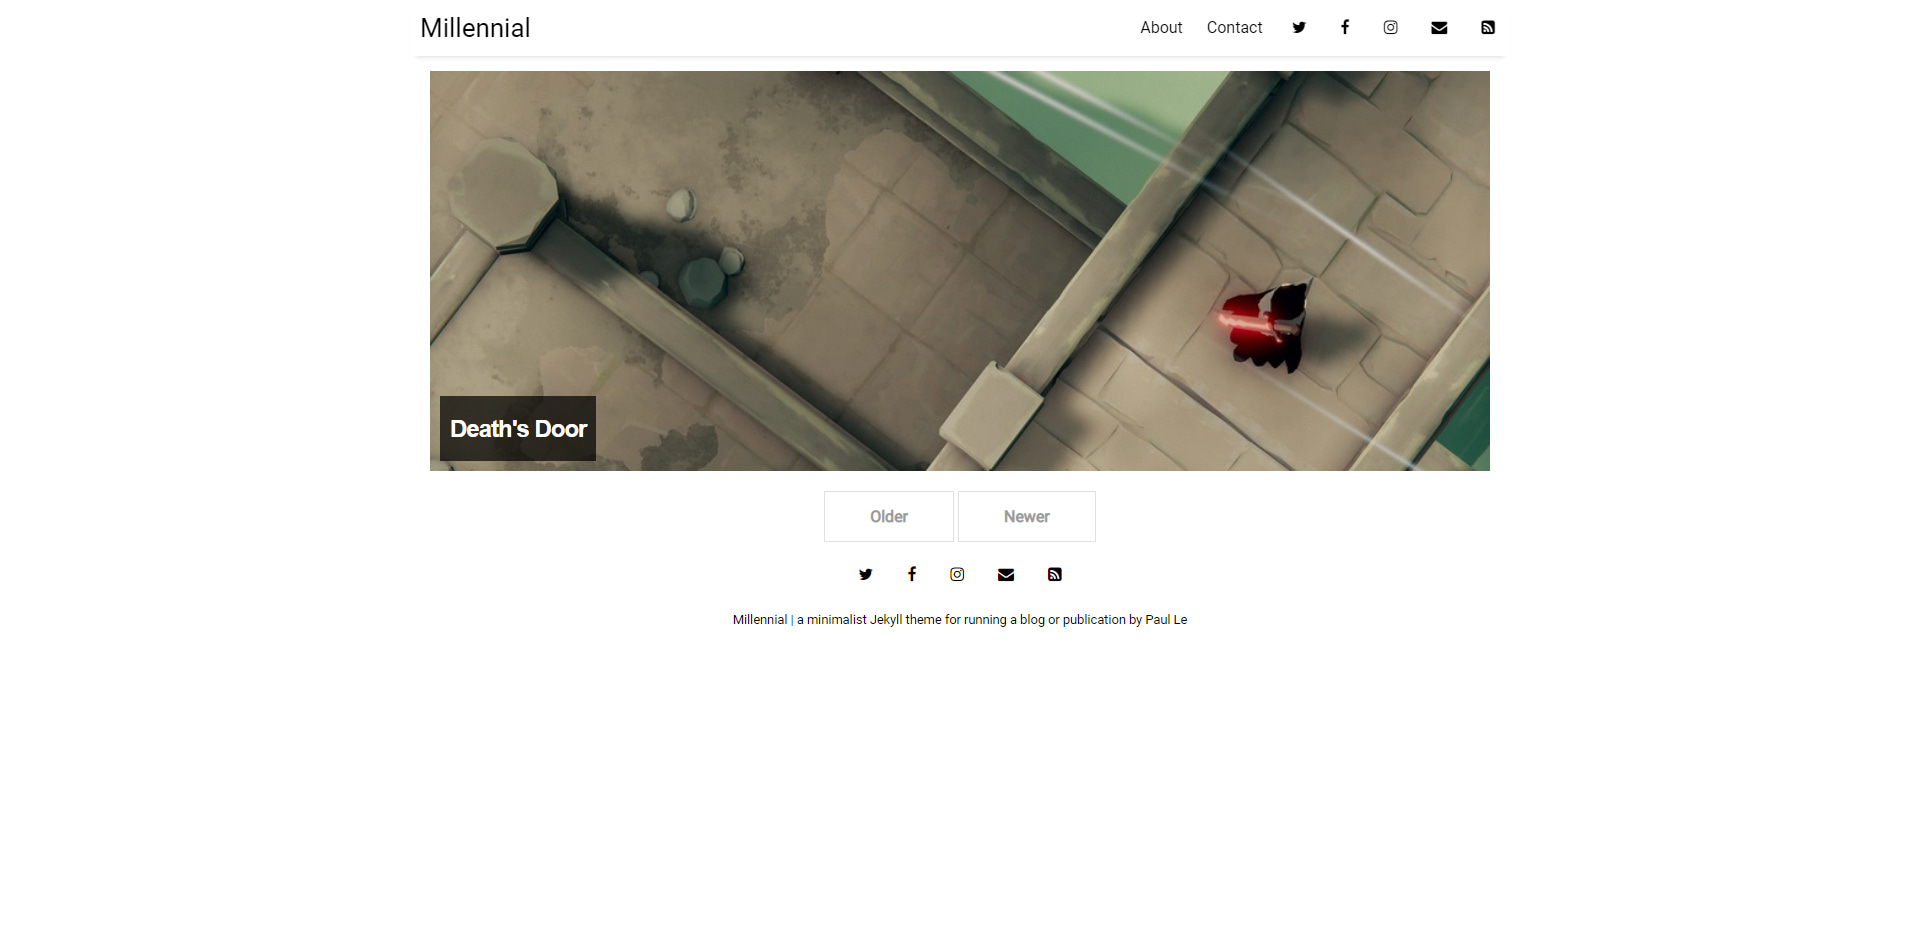
That part was probably more complicated than it needed to be, so if you have problems getting this to work let me know.
Polishing
We have almost everything done, now it’s time to do some polishing to the site itself. First, we will get rid of all the pages that don’t interest us. In our case, we will delete “Interesting Facts”, “Learning”, “Resources”, “Sample Posts”, and “Documentation”.
To do so we will have to go to the pages folder and delete all of these. This will delete the pages themselves, but we also have to get rid of them from the top menu, so we will go to the _data/settings.yml and delete them from there. Please be aware that the place to edit this menu will change from theme to theme, but it shouldn’t be too difficult to find.
Since we are in here we can also edit all of our relevant info, like updating our social links (if the site has some), or editing our google-ID for analytics (will link how to set that up later).
You can also go to the _config.yml file to edit your page title (which would be displayed in the browser tab). And of course, change the site icons by replacing the favicon.ico with whatever you want.
You will also probably want to edit the About page, so go to page/about.md file and edit its contents to whatever you want. You probably want to include a pic or something there, so play around with some html and css! Same with page/contact.md.
And as a final note, you can probably delete the images inside the assets/img folder.
Uploading and adding your albums to your site
And now, it’s time to create our albums!
GitHub allows us to use up to 2gb in our repositories, but it’s probably not enough for our photos. Besides, the speed at which images are loaded from a GitHub repo load is… pretty bad (understandably so, at the end of the day its a site for hosting code, not images!). So, we will be uploading them somewhere else.
You can, of course, upload these pictures wherever you want, as long as the .json format follows the format of the deaths-door.json example.
Compression and Discord as a host
A solution that I like to use, and has proved useful with the Hall of Framed, is using discord itself to host the images. Discord is fast, very reliable, and allows us to upload files up to 8mb in size for free.
The 8mb limit might seem too little to you, but the reality is, even if we all love uncompressed images, the internet is all but uncompressed, so before uploading them we will need to compress them. And if for whatever reason the 8mb limit is too little for you, you can always pay Discord Nitro for a single month and upload all the images you need.
For compressing my photos, I have had great success with Sqoosh. So if you want to use this in an easy and fast way you will first have to install npm (you may need to install an older version if you are on Windows, mine is 6.14.13 for what is worth), and then install squoosh-cli by running the command npm i @squoosh/cli. After it’s installed, go to the folder of your images and run the following command inside the PowerShell (if you are on Windows, if not just use your normal terminal):
squoosh-cli --mozjpeg '{quality:95}' -d out ./
This will compress all your images to jpgs of 95% quality, more than enough for your portfolio.
If you don’t know or want to install npm and squoosh-cli, I have heard great stuff about pinga, so you can alternatively give that a try.
Actually using Discord as a host
After compressing all your images, to upload them to Discord in an easy and fast way you will then need to install the following:
- • Python 3
- • pip
- • requirements.txt (to install this just run the command "pip install -r requirements.txt" in the same folder as the requirements.txt file)
After installing all of this download my script to upload photos to Discord.
But before using it, you will first have to:
- • Create a Discord server (and channel) in which you will dump your photos.
- • Create a Discord bot and add it to your dump server. You can follow this tutorial to do so.
After all of that is done, create a new .txt file in the same folder where you downloaded the generate_album.py script with the data from below, and change its name and extension to .env.
DISCORD_TOKEN=blablablaIAmAnApiKey
DISCORD_SERVER=randomservername
DISCORD_CHANNEL=randomchannelname
And now a little explanation of what each of these things is:
- • DISCORD_TOKEN: The discord bot's token.
- • DISCORD_SERVER: The name of the server to which the channel belongs.
- • DISCORD_CHANNEL: The name of the channel in which you will be saving the screenshots.
After doing that you will only need to grab the album folder and drop it into the script .py file. This will create a terminal that will log as its uploading the images. It will also create thumbnails used in the grid.
Adding our albums to the site and how Discord thumbnails suck
After the script finishes uploading the album it will create a .json file with all the links. Copy that into the _data/virtual-photography folder and create a new .md file in the _posts folder with all the necessary data like the death’s door example. Please be sure that the .json file name doesn’t have spaces, special characters, or capital letters, and the associated .md file with the album data has the same name (except the date, so deaths-door.json and 2022-03-05-deaths-door.md).
But Nico, you may ask, doesn’t discord allows you to generate thumbnails on the fly? And you would be right wise reader! However, the quality of the thumbnails generated by discord from jpg images leaves much to be desired. Here is an example:
Automatic discord thumbnail:

My own generated thumbnail:

So, by creating the thumbnails ourselves we are making sure their quality is as high as possible.
Just for documentation sake tho, and if you are interested in the details, to be able to take use of these automatic Discord thumbnails you have to change the cdn start of the link for media and append it with ?width=450&height=600 or whatever size you want to resize the image (you can even do so with different aspect ratios to the original image! With the result being Discord cropping it). So given a link like cdn.discordapp.com/attachments/id1/id2/pretty-image-of-a-dolphin.jpg would change to media.discordapp.com/attachments/id1/id2/pretty-image-of-a-dolphin.jpg?width=450&height=600.
Discord automatic thumbnails for png files isn’t as bad, but since we are compressing our images to jpgs to be able to upload them to our dump Discord server (and to make our site more lightweight), we won’t be making use of this.
Putting your site online
After uploading all of our albums to our site we now only have to put it online. In the case of this theme, we don’t actually have to do anything! But I will still try to explain how you would go about doing it for completeness’ sake.
So to do this we will first need to create a branch in our repository called gh-pages. Delete everything on the branch, making it empty. You can do it by following this tutorial.
Then, go to your main branch (where you have all of your site files) and add this file in a folder called .github/workflows/ (you will have to create said folder and subfolder). When trying to commit this you will have to do some GitHub verifications to assert that is actually you who is uploading this.
We are using an action instead of GitHub vanilla Jekyll support just in case the theme you choose is using a plugin that isn’t whitelisted by GitHub. The idea behind this action is that it will compile the site, as you do locally, cut the compiled site folder, and paste it into this new branch. So the files that will be used to render the site itself (not build it), will live there.
And last but not least, go to your repository settings, and then go to the “Pages” section. Make sure the Source is set to “Deploy from a branch” and select the branch to be gh-pages. Click on Save.
After doing that wait for a bit until GitHub finishes deploying your site and tada! Your site will be online! Head over to sonozki.github.io to see the site used as an example here working.
If for whatever reason the action fails to deploy, you will have to google the error it threw you and fix it. Most of the time you would only have to edit the workflow.yml file to accommodate it to your own specific case/theme, but you may also need to add something to the Gemfile depending on the error.
If you need more information about this action take a look at its repository.
Keep reading
There is more stuff that you may want to do to improve your site even further. Maybe the theme you choose already has some of these, but I will link them just in case:
- • Add Twitter cards: That image that is displayed when linking your site in Twitter for example)
- • Add Google analytics: To be able to track some data regarding people using your site.
- • Google search engine: To index your site into Google's search engine, so it appears in search results.
- • jekyll-sitemap: Also useful (needed?) to index subpages from your site into google.
- • SEO: To make your site more likely to appear in search results.
- • A collection of awesome Jekyll plugins: In case you want to do more stuff to your site.
And that’s all! I apologize if trying to make this work (or reading the guide itself) gave you some headaches. Hope you enjoyed reading this and got something useful out of it c:
If you have any questions don’t hesitate to hit me up. Also if you happen to create a site using this please leave it in the comments here! Would love to see it!
